Welcome to VIDEOLANE free tutorial series on Apple’s Final Cut Pro X video editing software. These lessons will guide you through the steps of using Final Cut Pro X, so you can quickly begin editing and delivering a video project from start to finish.
If you are interested to have a 1-to-1 personal FCPX training by Adrian Lee, click here.
About the Basic Lessons
It’s all about keeping things simple.
- You will learn the easiest way of doing things so you don’t have to remember other ways nor remember any keyboard shortcuts.
- You will learn the essential tools enough to get you from start to finish, so you don’t have to learn and remember every available button.
Here are the steps to getting started quickly on Final Cut Pro X 2018…
Basic Final Cut Pro X Tutorial for Beginners
Before we begin, create a project folder to store all video clips, music, and images involved in this video.
Step 1: Open Library
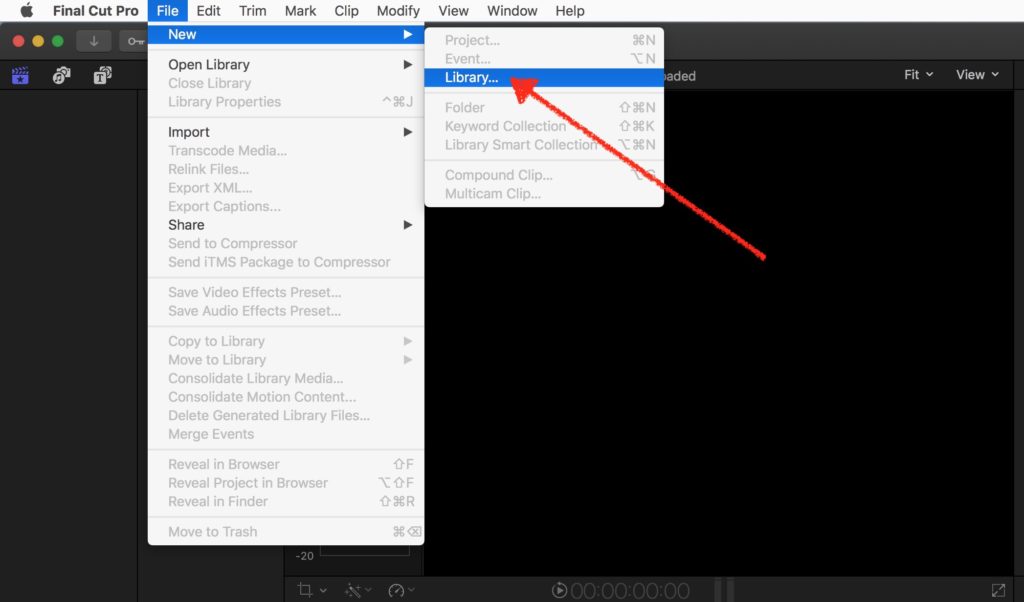
Every new video project starts with a new “Library”. A library is a folder containing events, projects and media files. So let’s open a new library.
From the main menus, select File > New > Library…
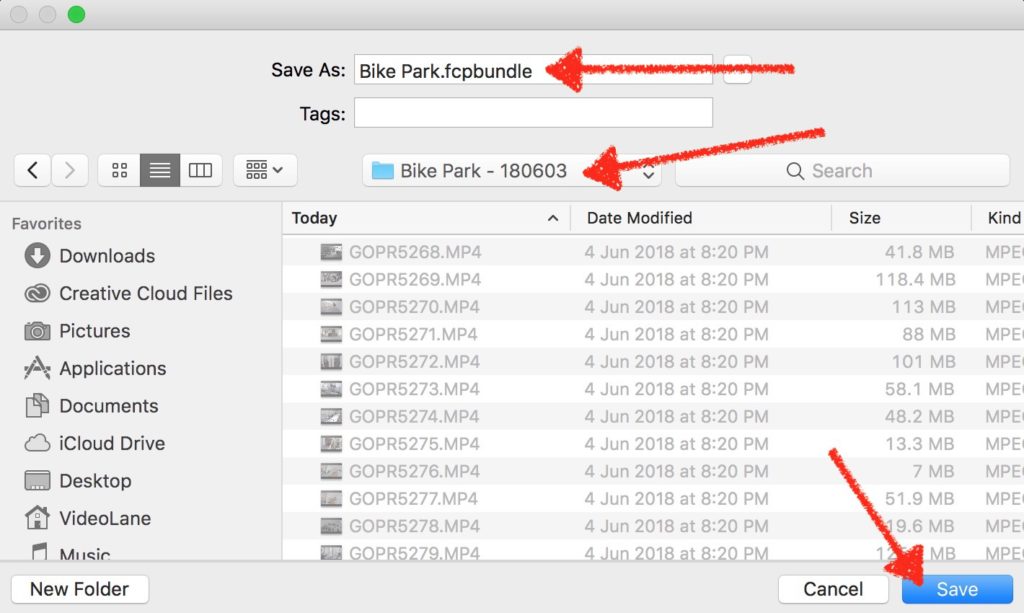
(1) Enter library name, (2) locate project folder and (3)Save.
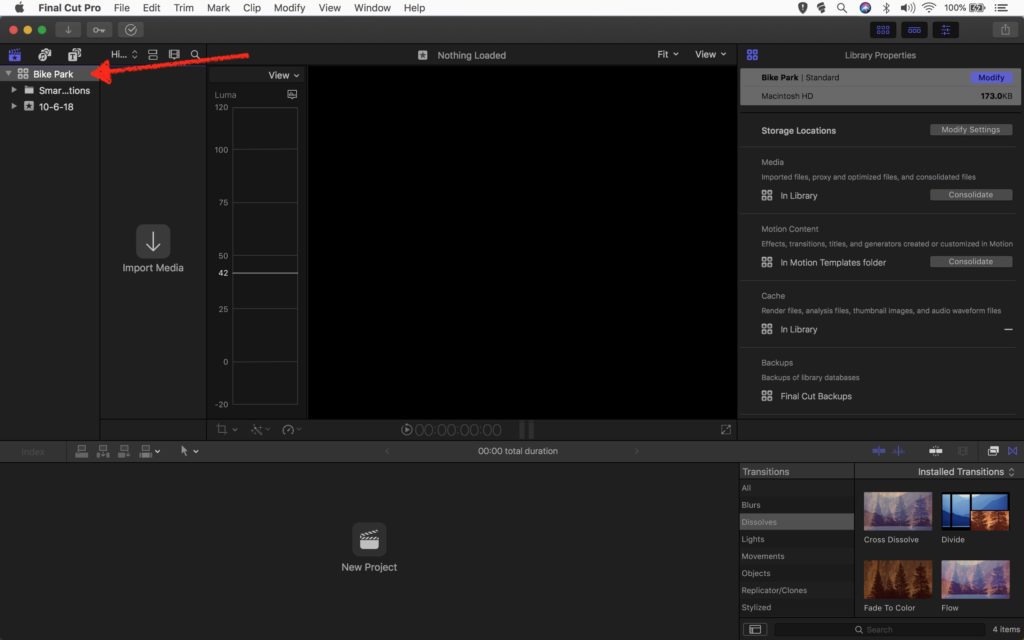
The Library will be located on the top left in the Workspace.
Step 2: Import Media
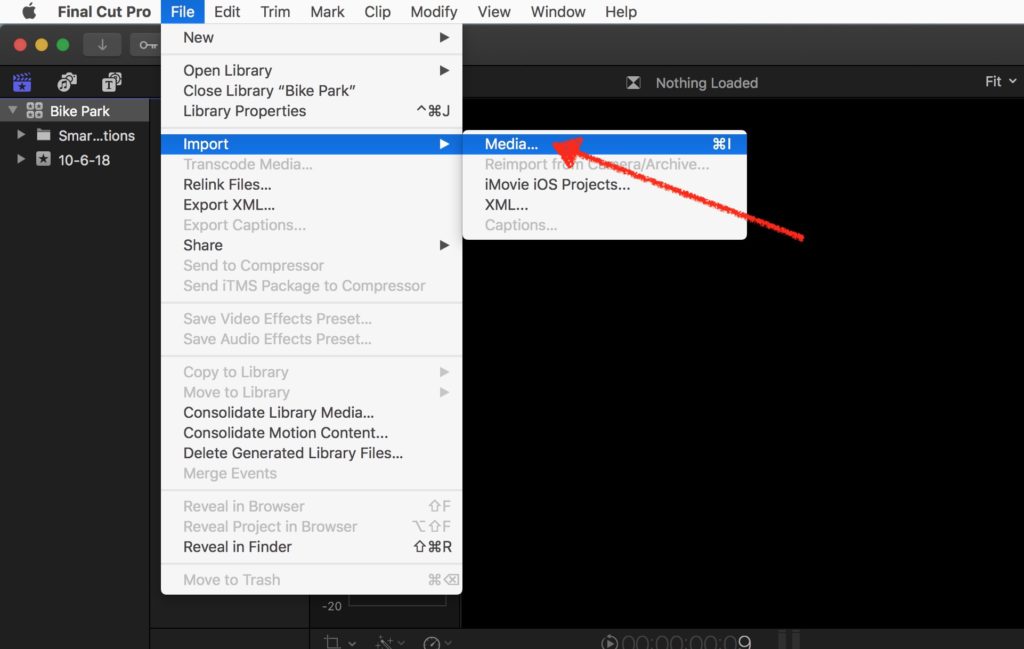
When we bring video clips into Final Cut Pro for editing, we call it Import Media.
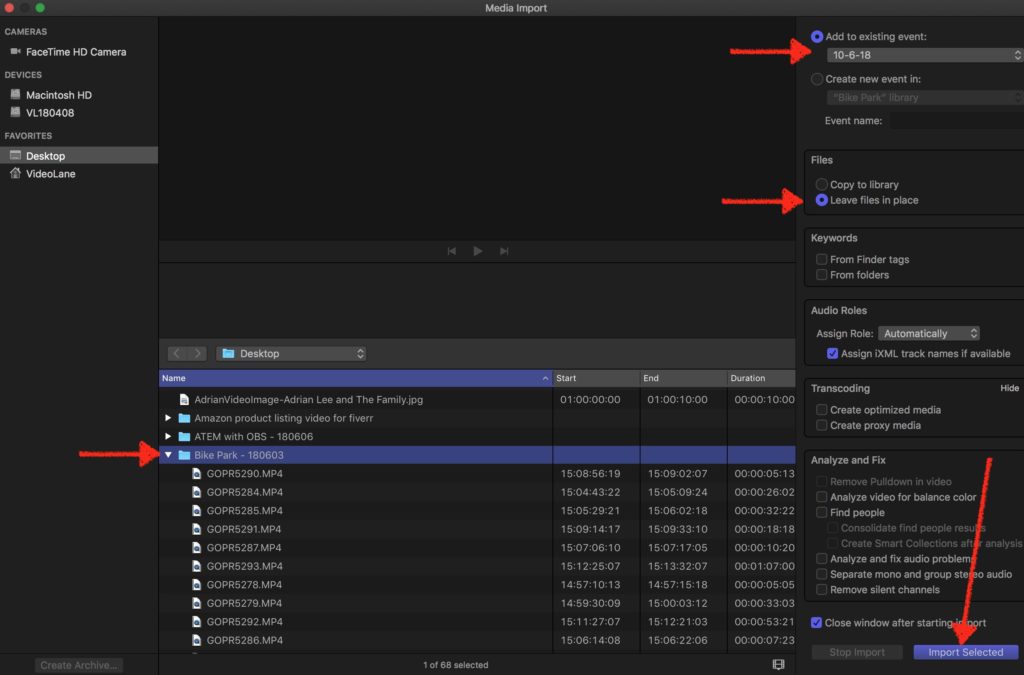
From the main menu, select File > Import > Media…
Set up the Media Import as follows. (1) Choose the project folder containing the video clips, (2) leave Add to existing event as default, (3) select Leave files in place, and (4) click Import Selected.
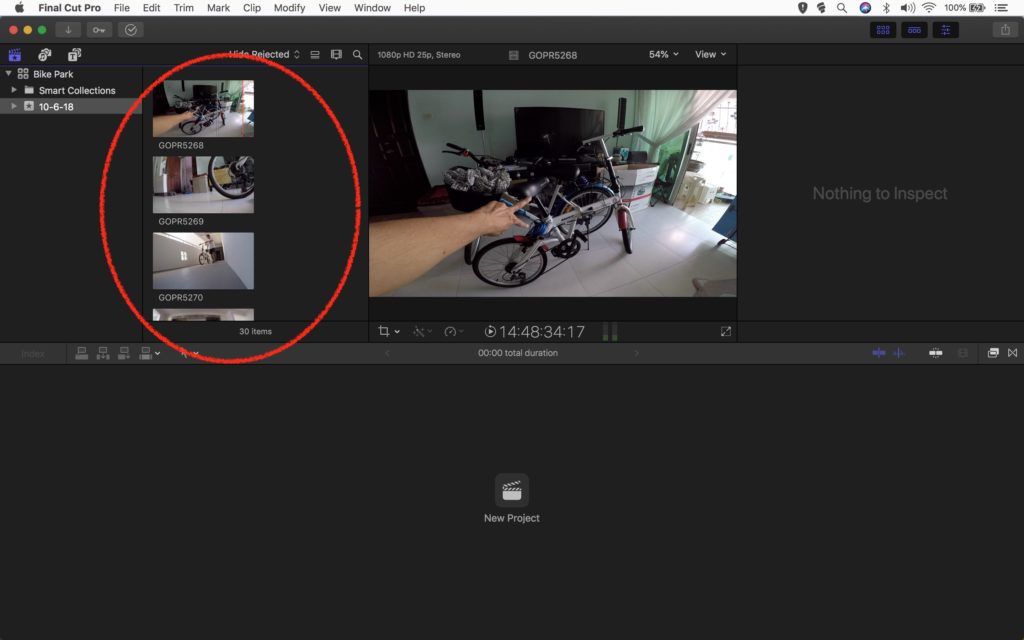
The video clips will appear as filmstrips in the top left of the workspace.
Step 3: Explore Workspace
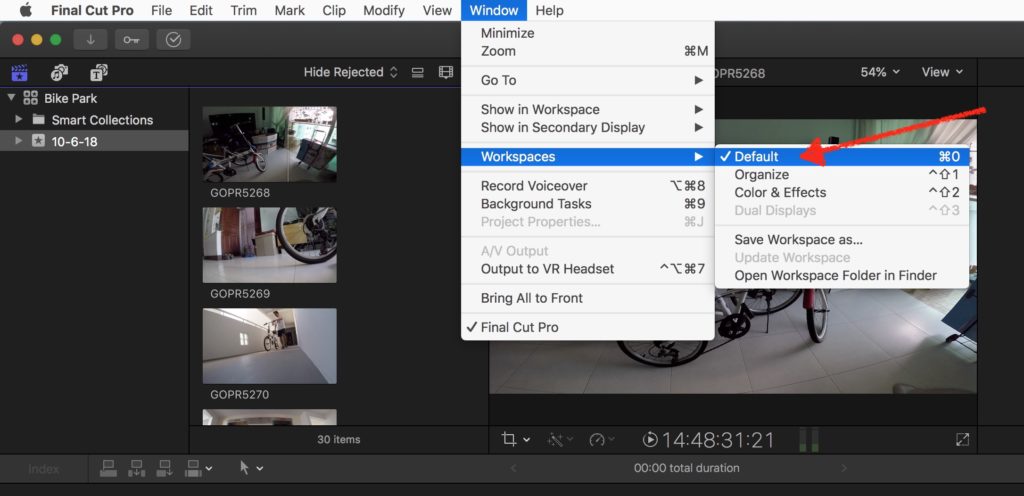
If your interface layout does not look the same as mine, let’s revert to the original default workspace layout.
From the main menu, select Window > Workspaces > Default.
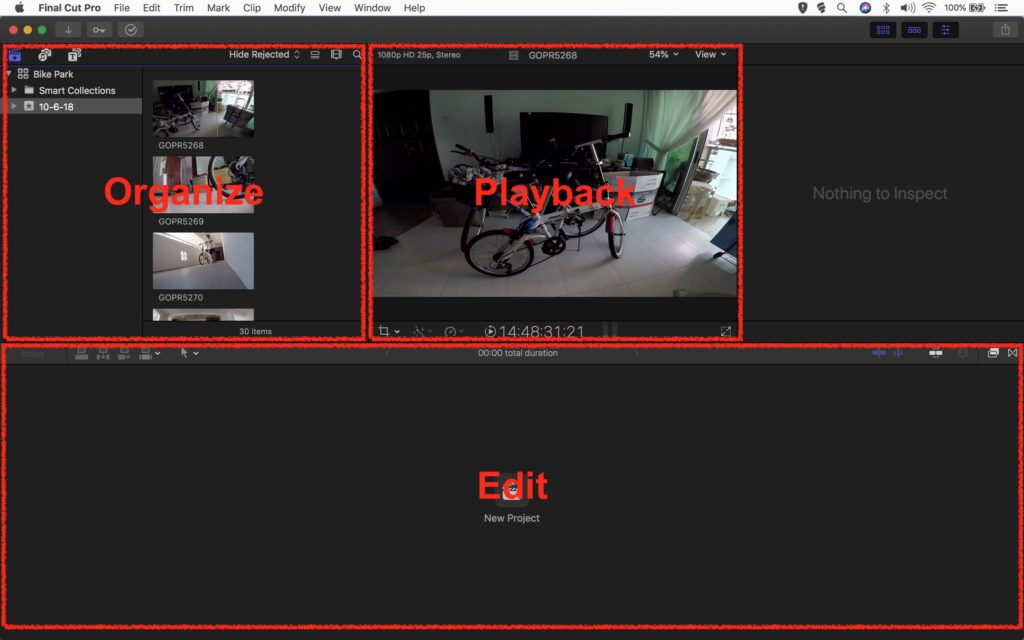
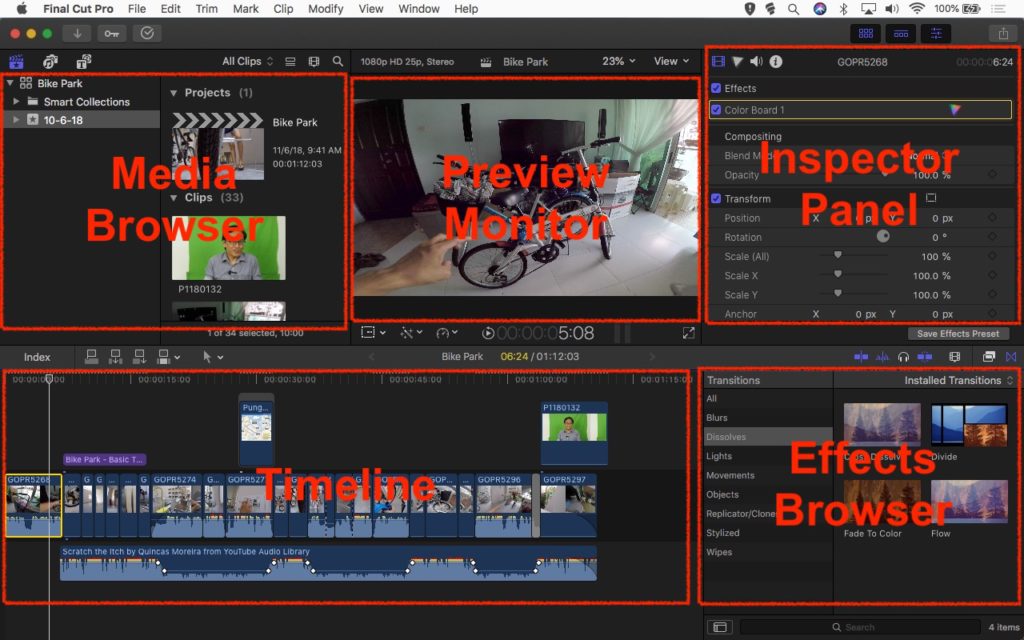
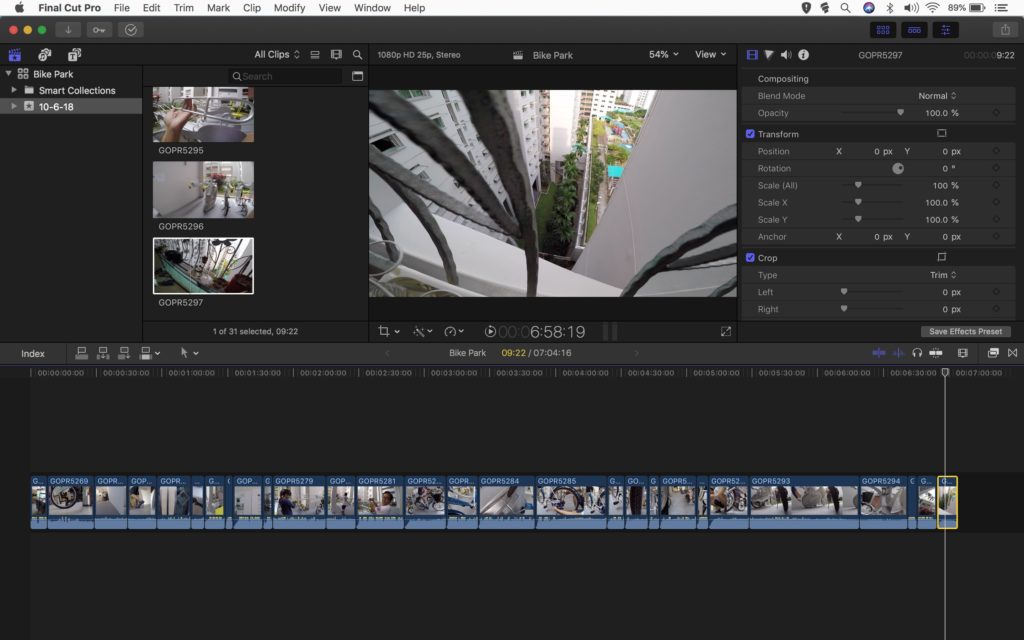
The workspace consists of three main work areas for (1) Organizing, (2) Playback and (3) Editing.
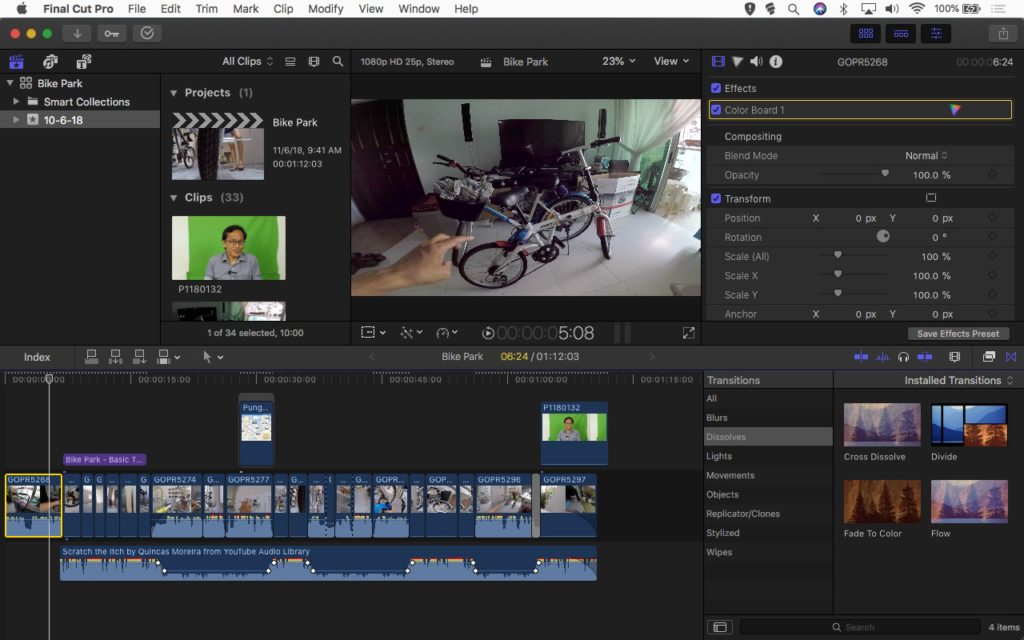
This is the typical workspace layout when editing is in progress.
These are the typical work areas used during editing.
Step 4: Create Project
One more thing to create before we can start editing. That thing is the “Project”.
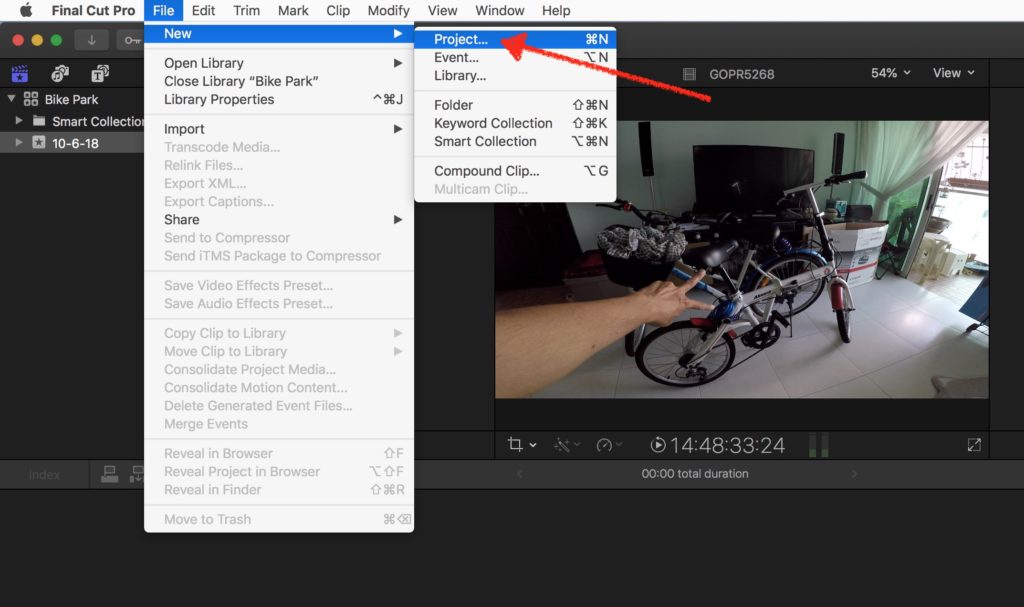
From the main menu, select File > New > Project…
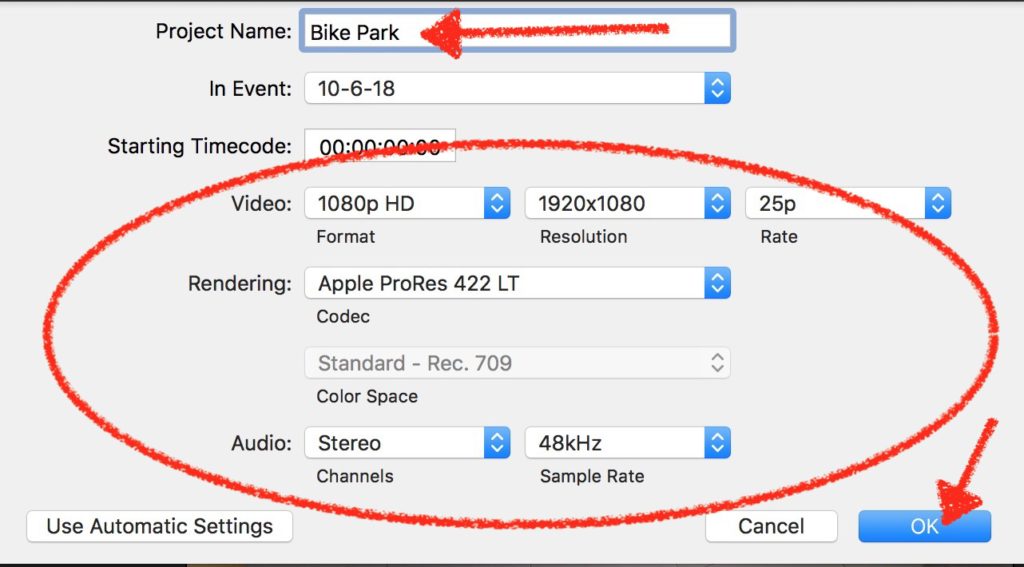
Change Project Settings… (1) Type in a Project Name (2) Follow the settings below for Video, Rendering and Audio, then (3) click OK.
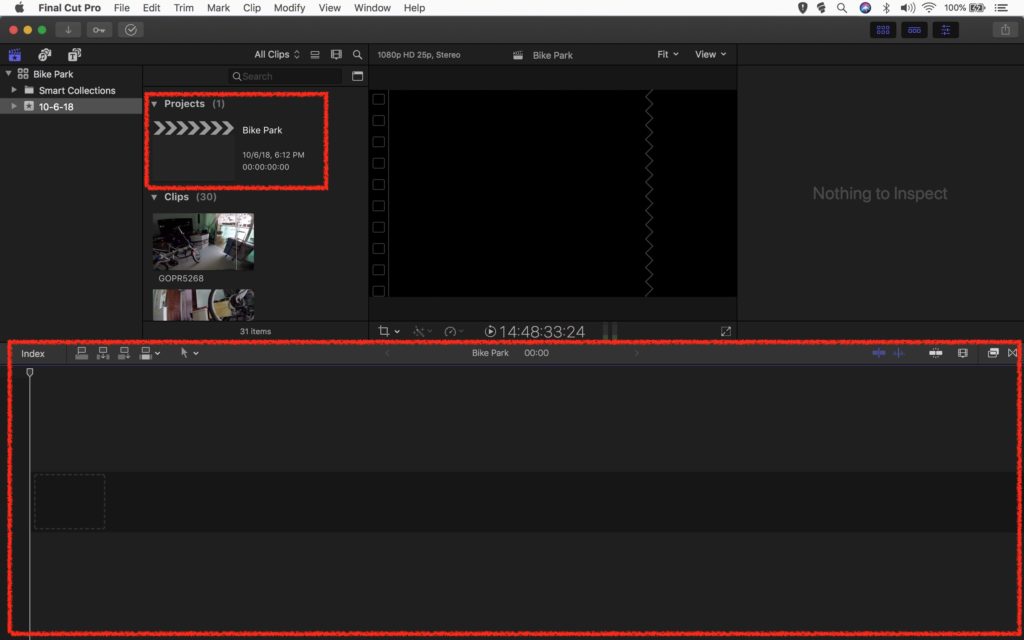
The new Project appears in the Media Browser and a new Timeline appears in the editing area.
Step 5: Assemble Clips
Now it’s time to select our raw video clips and lay them in a sequence to make a movie.
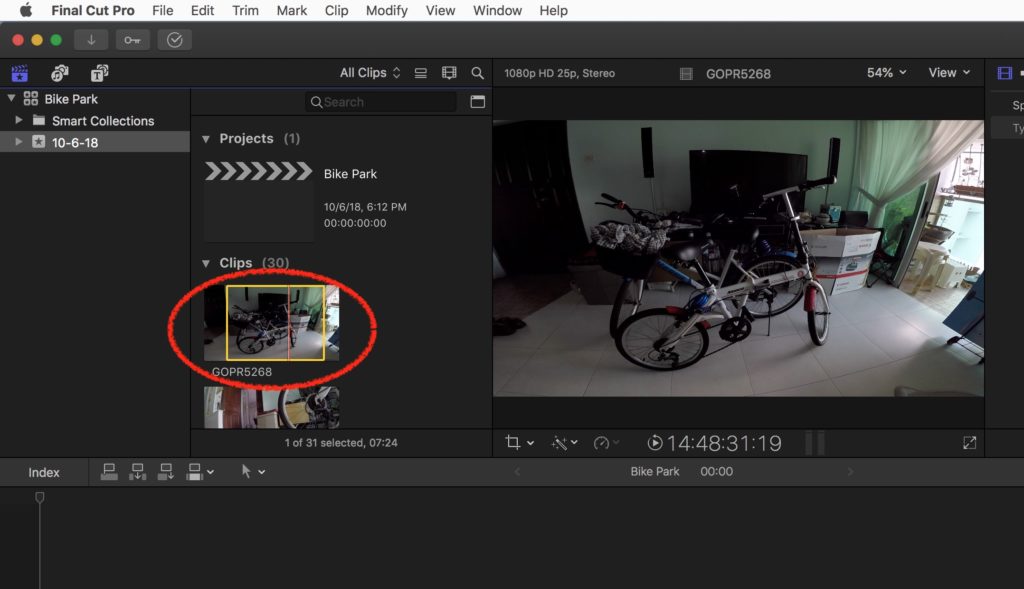
Go to the first clip in the Media Browser. (1) Move the cursor over the clip. (2) Press spacebar to play the clip. (3) Press and hold the mouse to select the desired range.
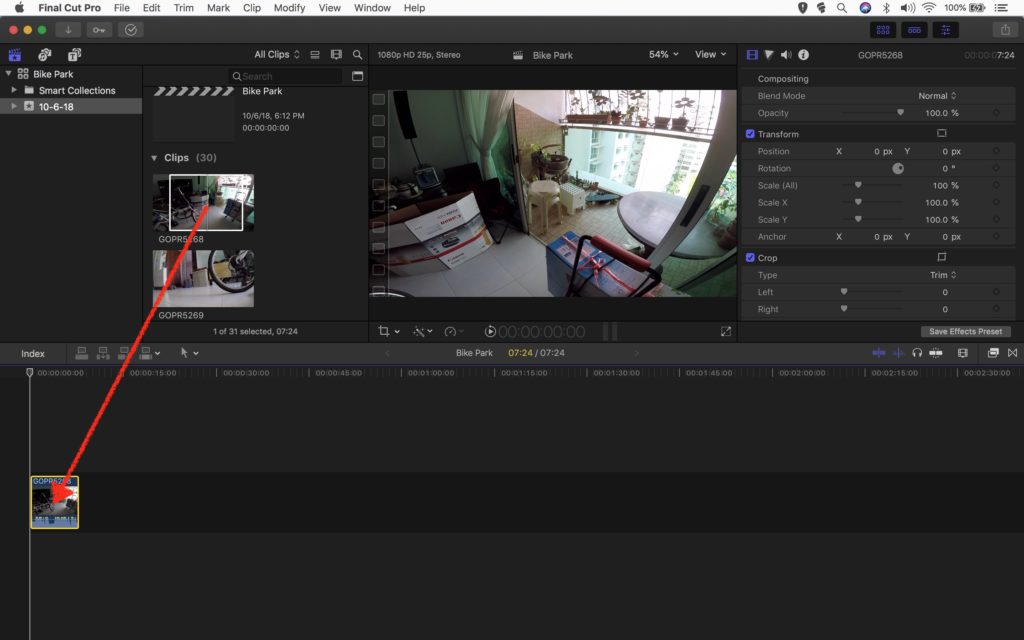
Drag the clip and drop it onto the Timeline.
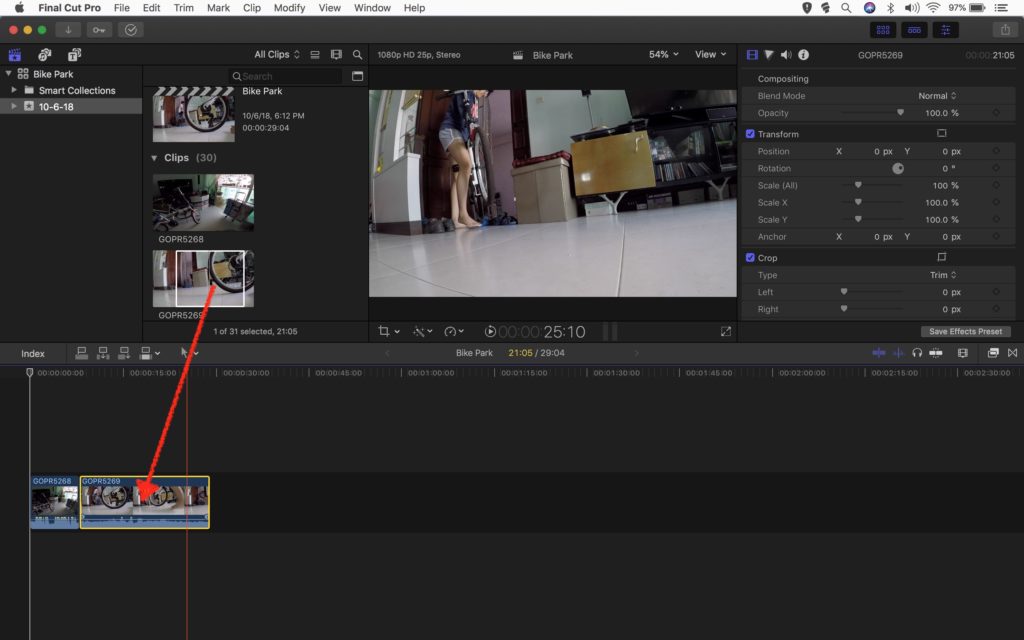
Next, select a range from the second clip in the Media Browser and drag it into the Timeline next to the first clip.
Keep doing the same for the third and the rest of the clips.
Step 6: Play Timeline
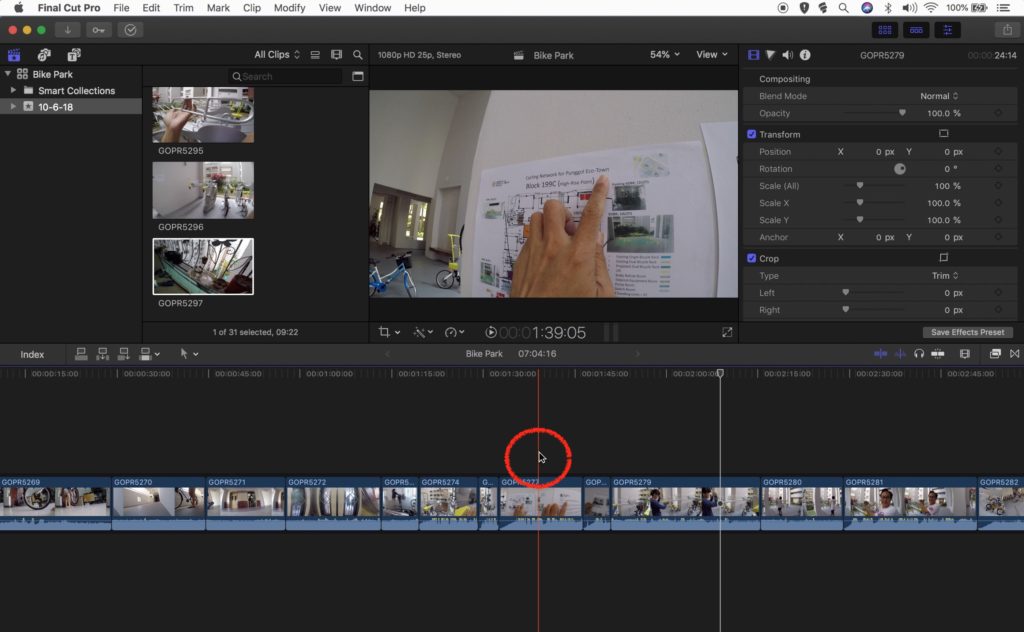
Let’s playback and watch the clips on the timeline.
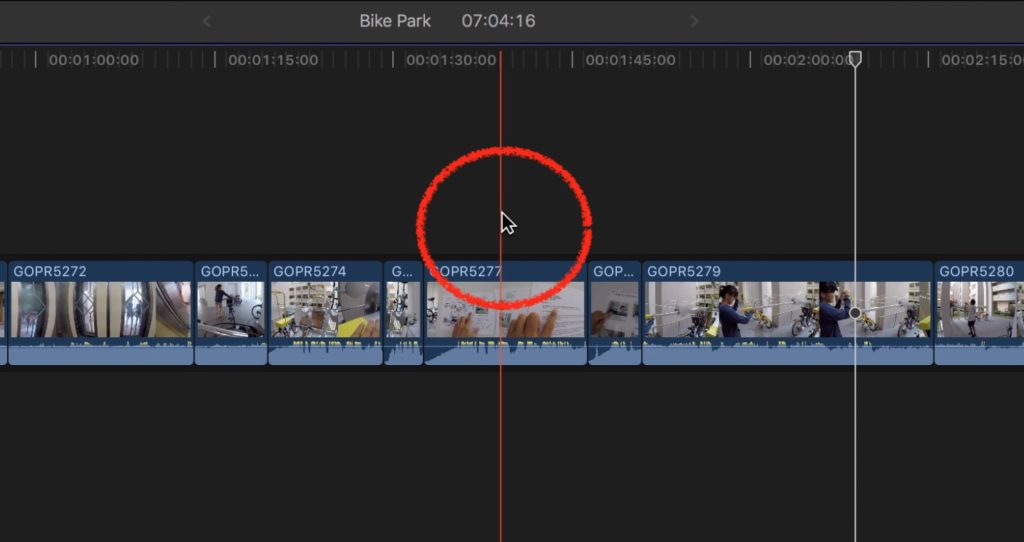
Move the cursor or “skim” over the clips on the timeline (with the red line) to any position and press the spacebar to play.
Step 7: Adjust Timeline
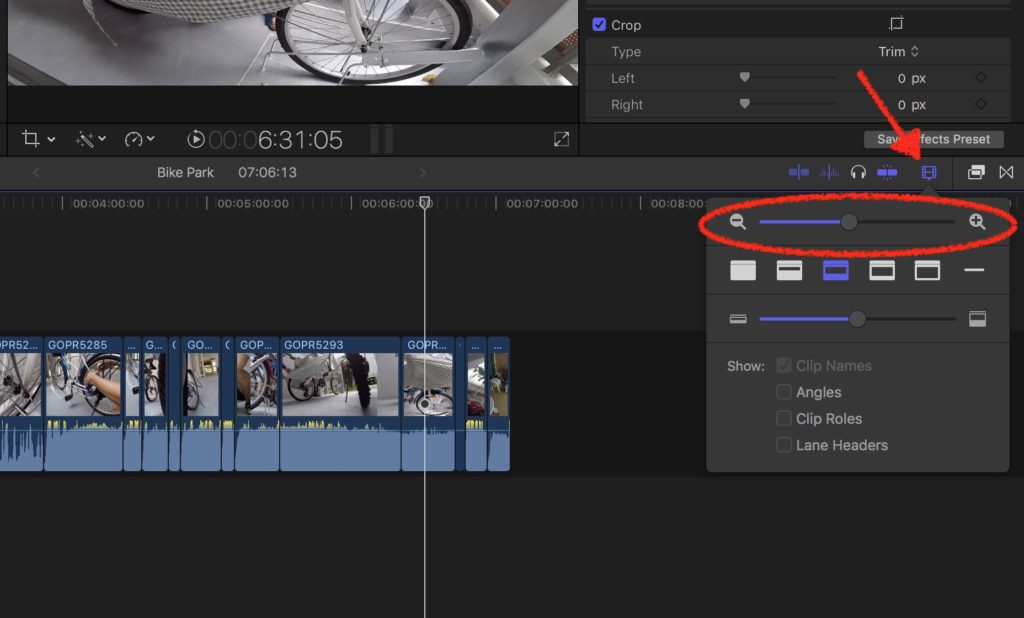
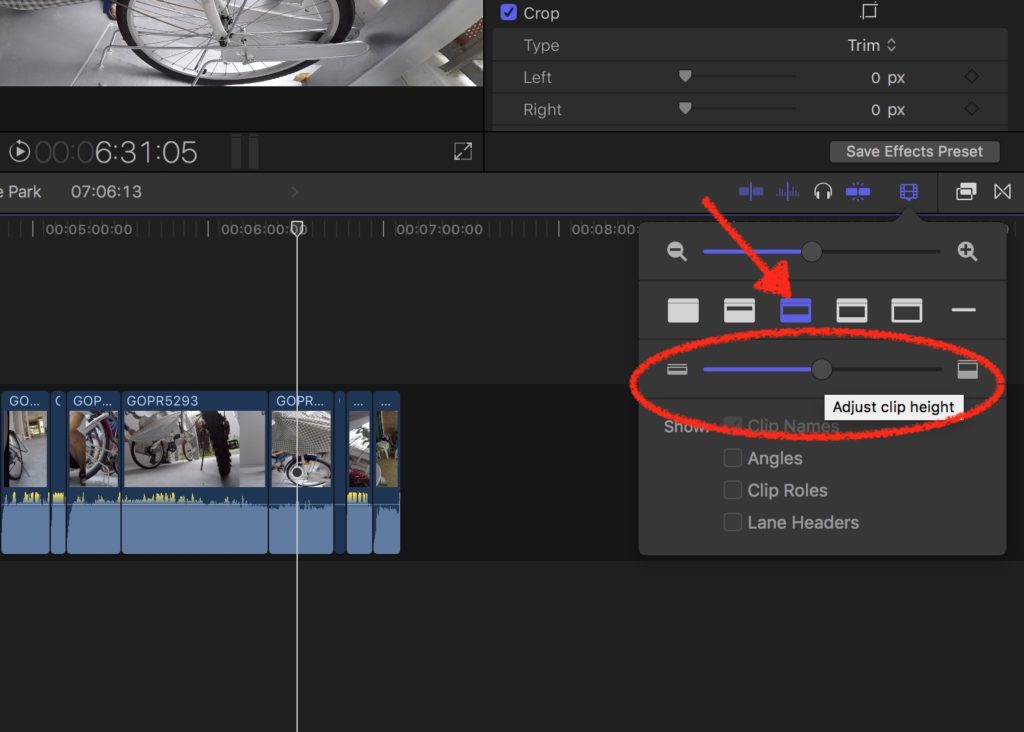
Zoom in and out of the timeline by clicking on the Appearance button and adjust the magnifying glass slider.
Increase the timeline clip height by selecting a display option and adjusting the slider.
Step 8: Trim Clips
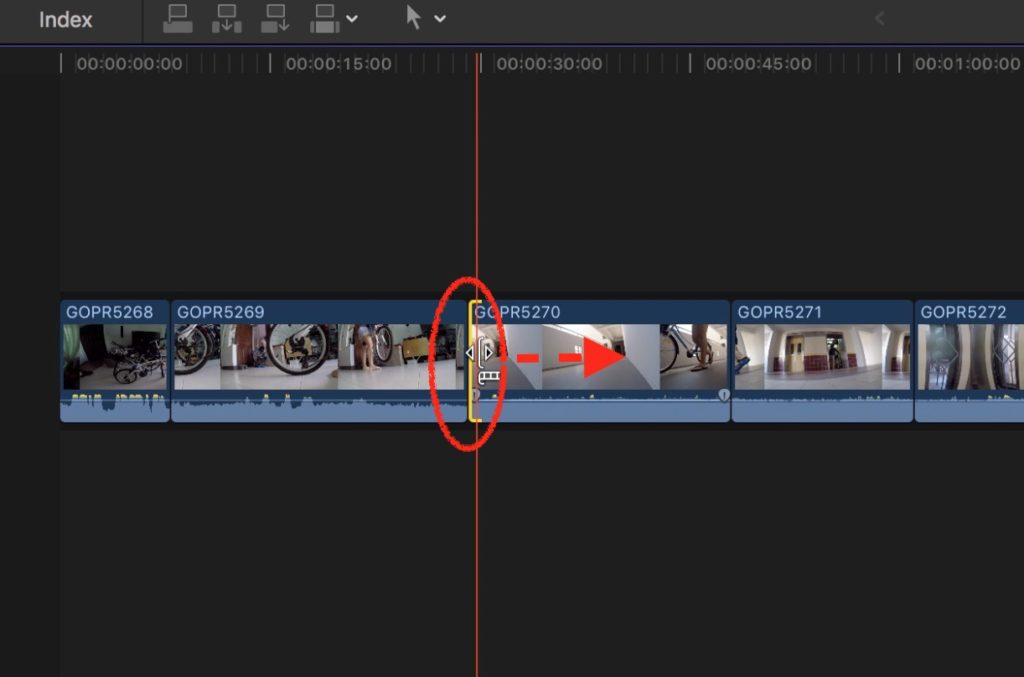
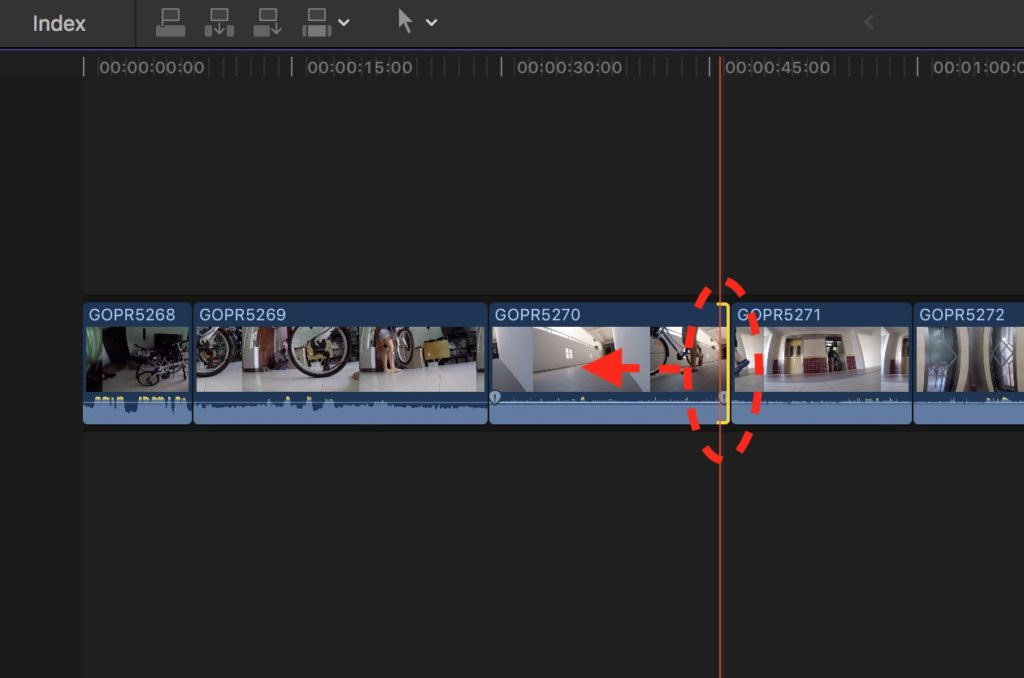
Some clips are a bit too long. Make them shorter by trimming.
To trim the front end of a clip, press and hold the front edge and drag it to the right.
To trim the back end of a clip, press and hold the back edge and drag it to the left.
Step 9: Split Clips
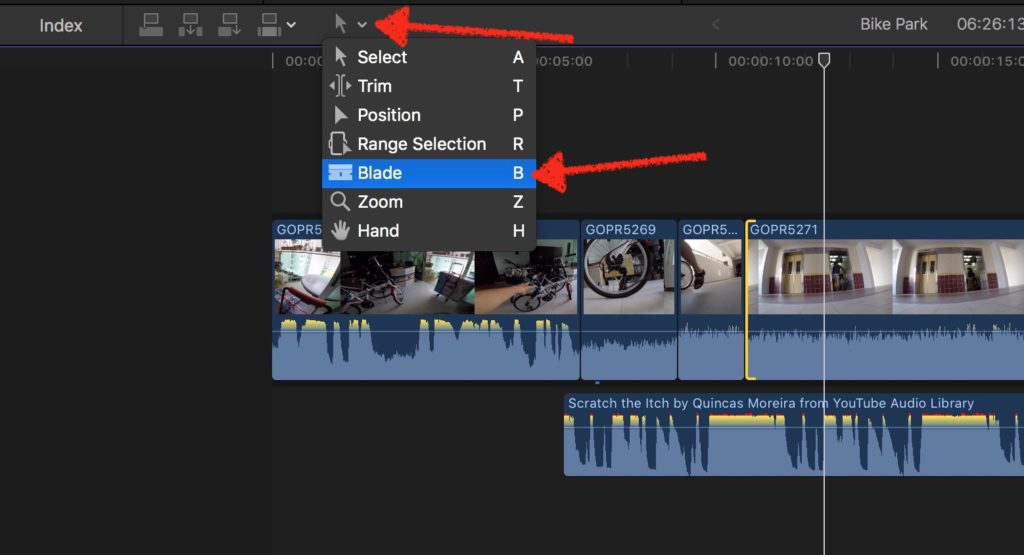
Sometimes, we want to split a clip into two or more sections.
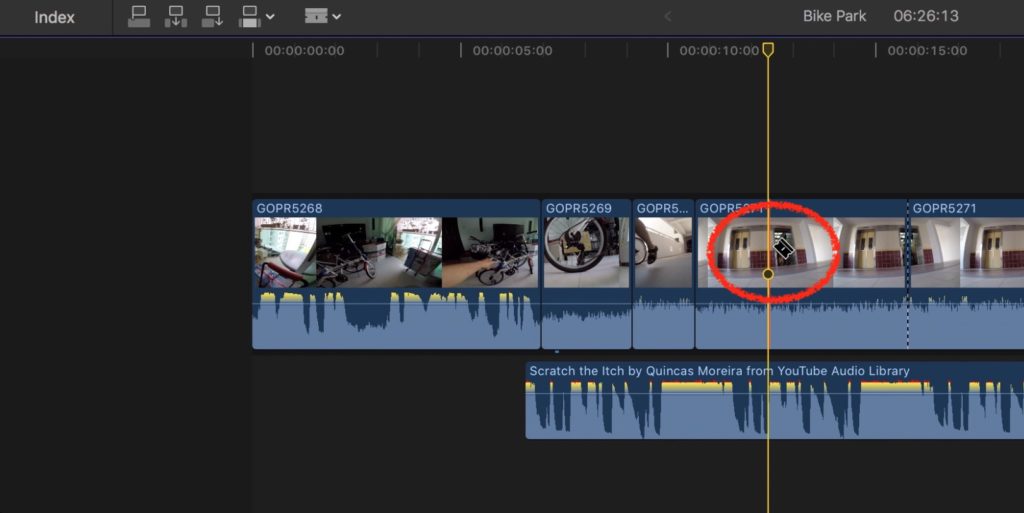
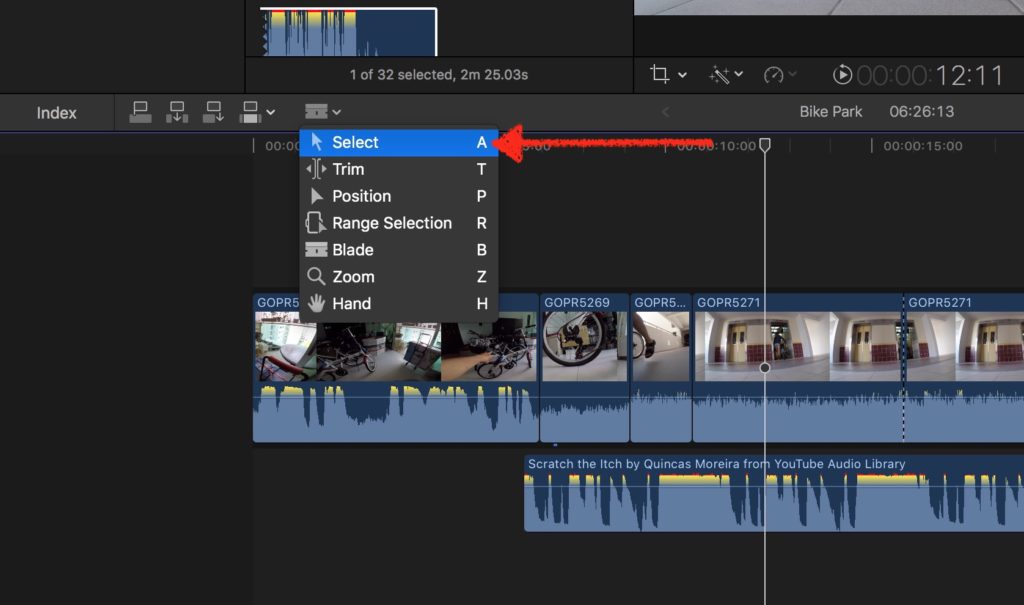
Go to the Tools Selection button and select “Blade”.
Go to the part of the clip you want to split and click on it.
After splitting, go back to the tool selection button and select Select Tool.
Step 10: Add Music
Let’s add music.
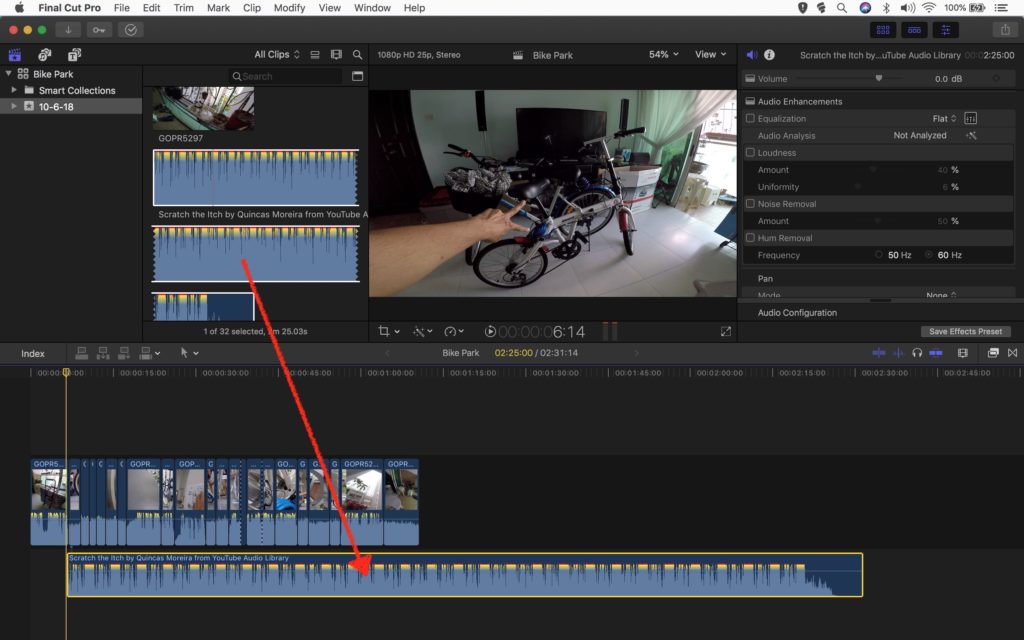
Import a music file, then drag it from the Media Browser into the timeline below the video clips.
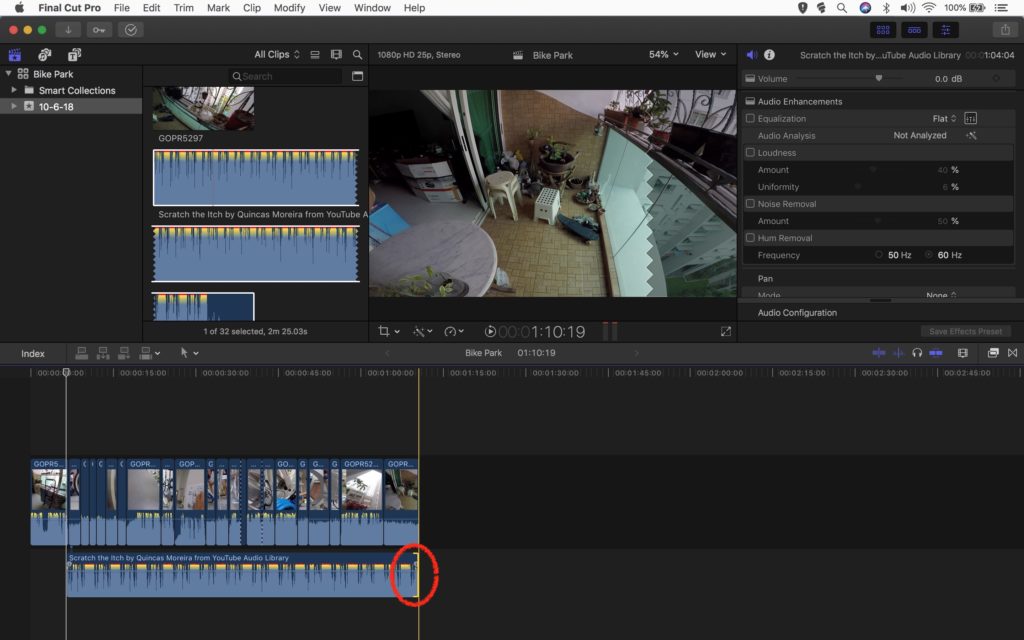
Right now, the music is longer than the video. Trim the music to end at the same time as the end of the video.
Step 11: Adjust Audio
Let’s adjust the audio volume to lower when someone is talking.
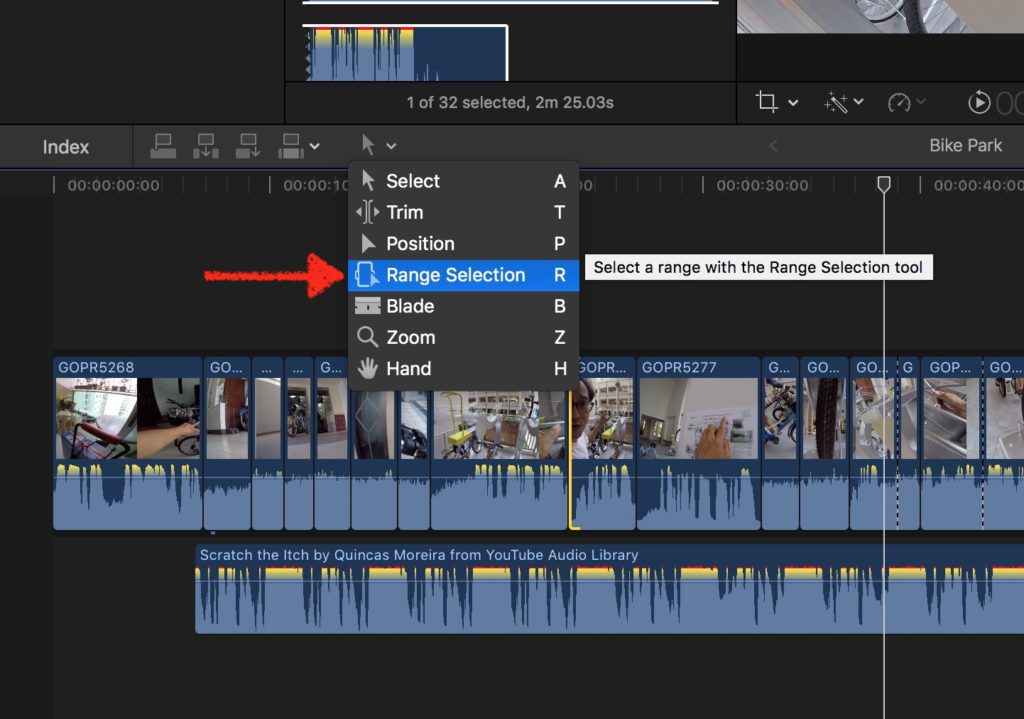
Click on the tool selection button and pick Range Selection Tool.
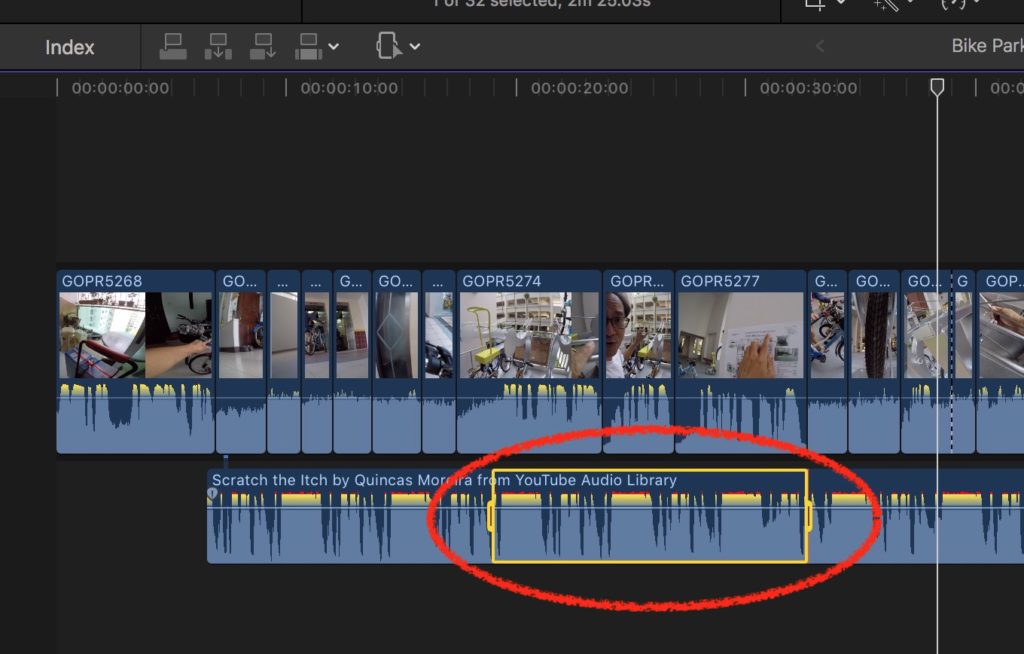
Mark the portion of the music clip where you want the volume to go down (when you want to hear someone in the video talking).
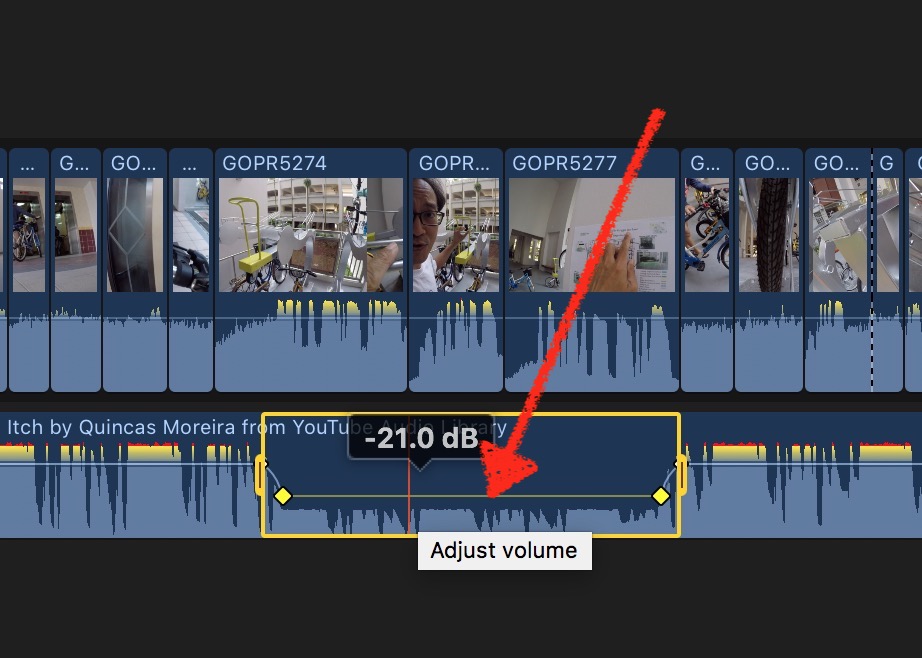
Pull the thin white horizontal line in the music clip down to about -21dB to lower the volume of the music in the selected range.
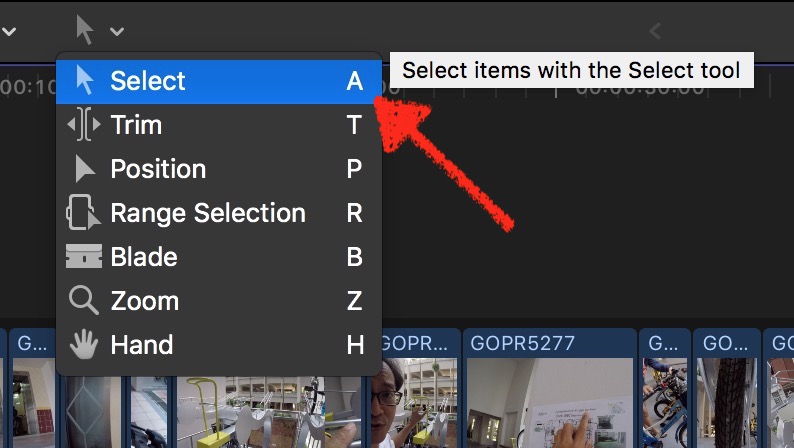
After lowering the volume, remember to pick up the Select Tool again.
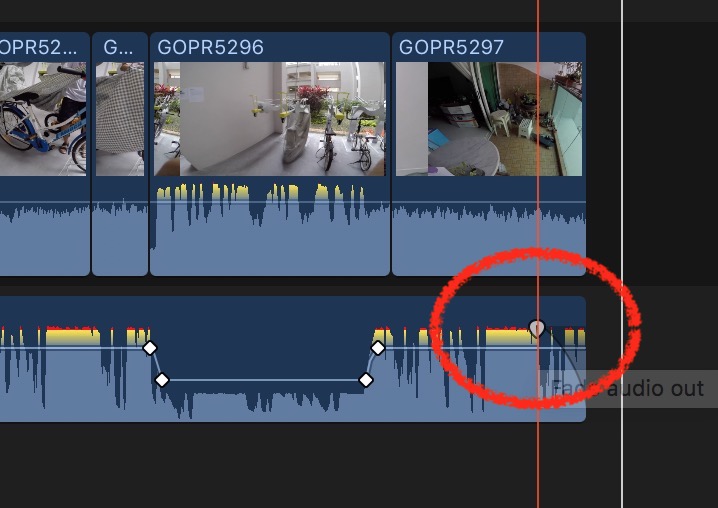
Slowly lower the volume at the end of the music to zero by adjusting the fade handle to the left.
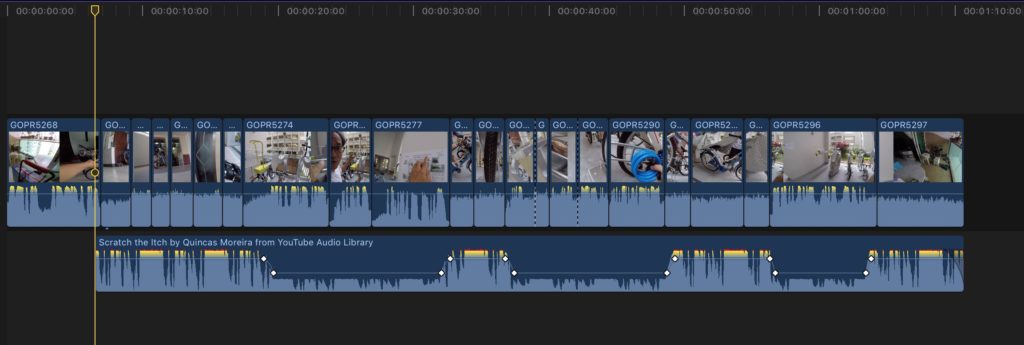
The music track may end up looking like this with the volume going up and down.
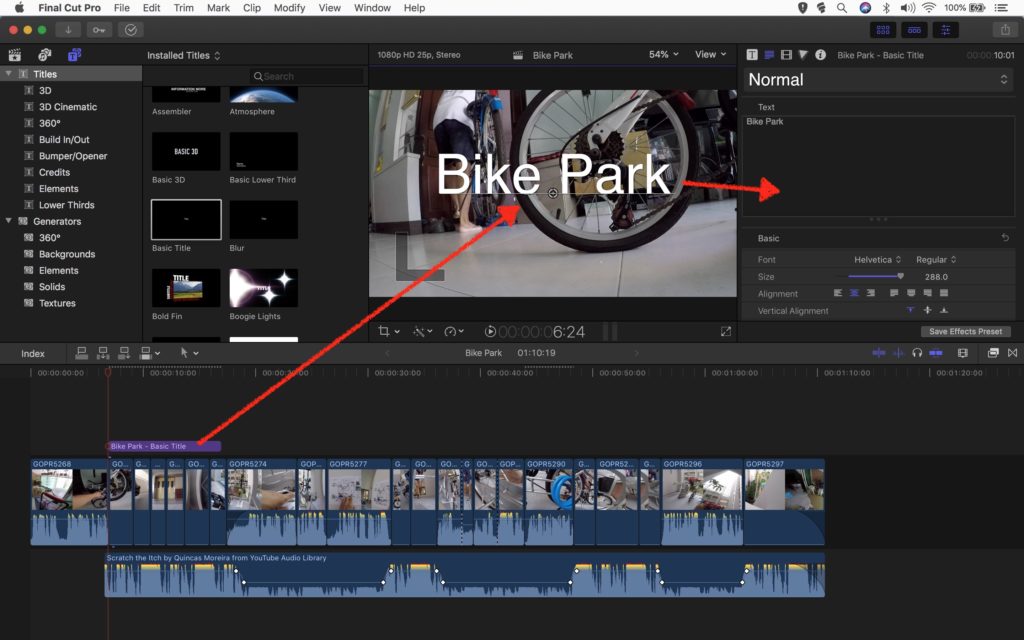
Step 12: Add Text
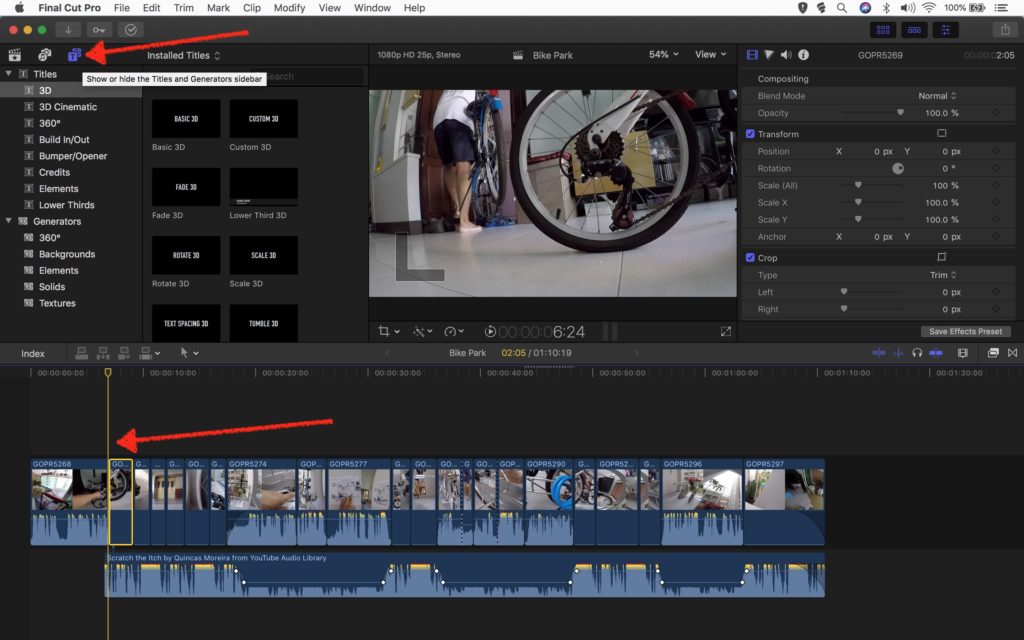
Now let’s add text and titles to tell our story.
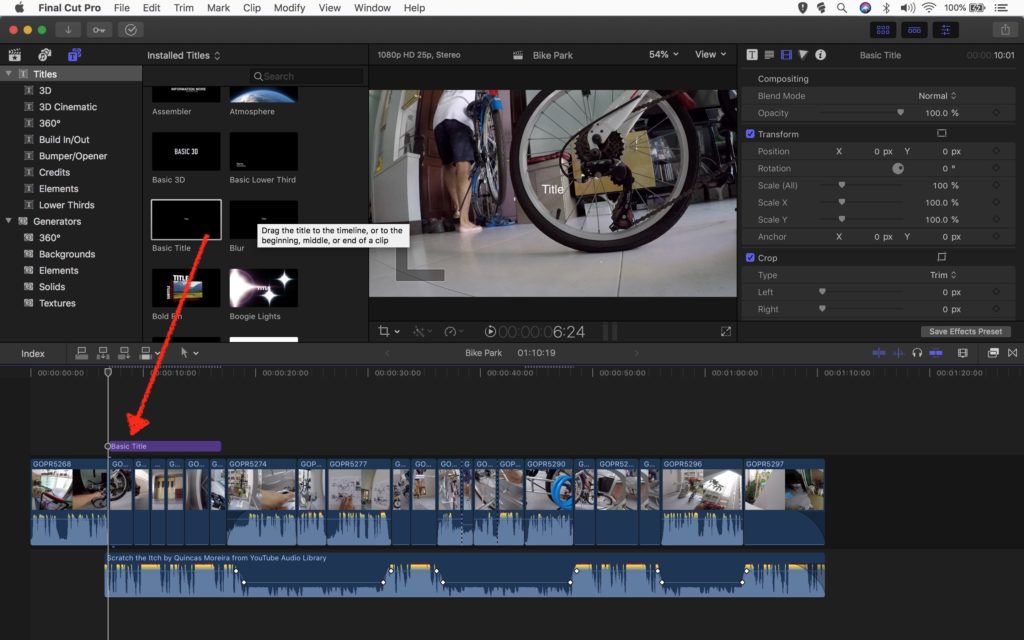
Select a text effect and place it over a clip in the timeline.
Type in the text in the monitor and adjust text properties.
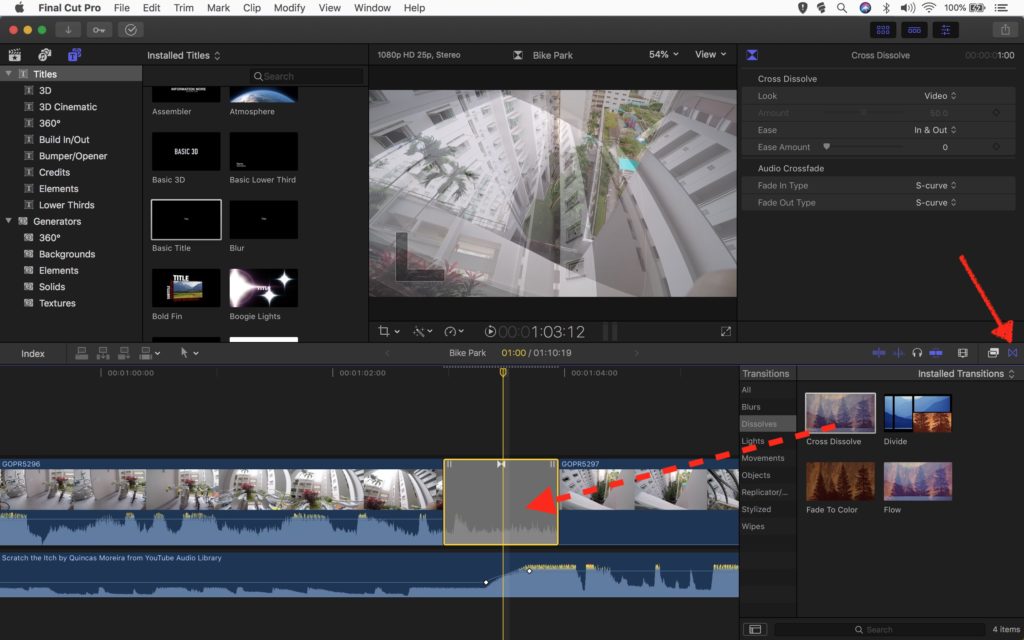
Step 13: Add Transitions
(1) Click on the Transition Browser button. (2) Select a transition effect. (3) Drop the transition effect between 2 clips.
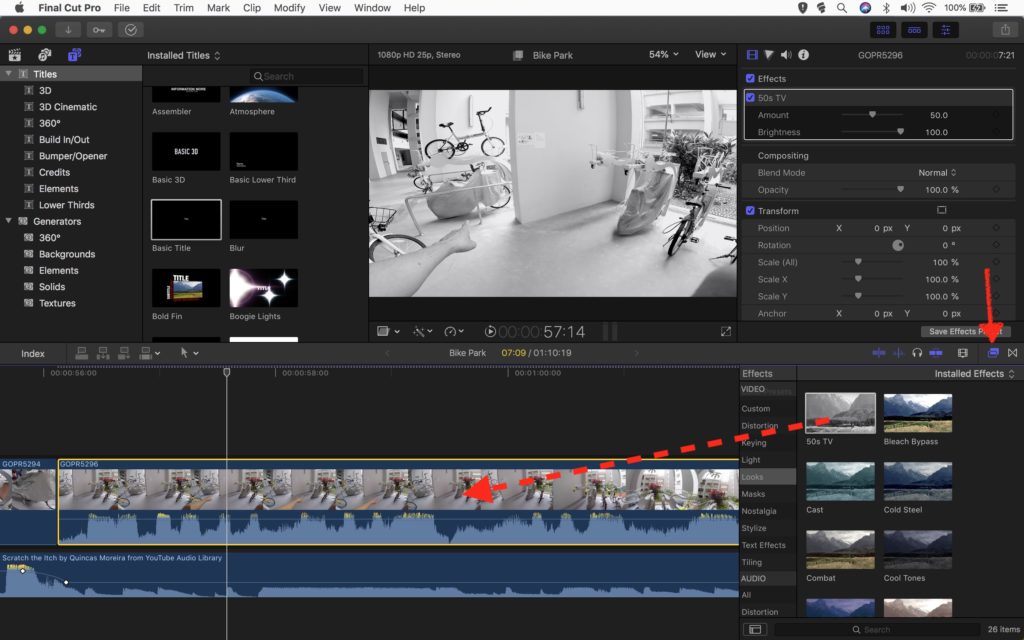
Step 14: Add Effects
(1) Click on the Effects Browser button. (2) Select an Effect. (3) Drop the Effect onto one clip.
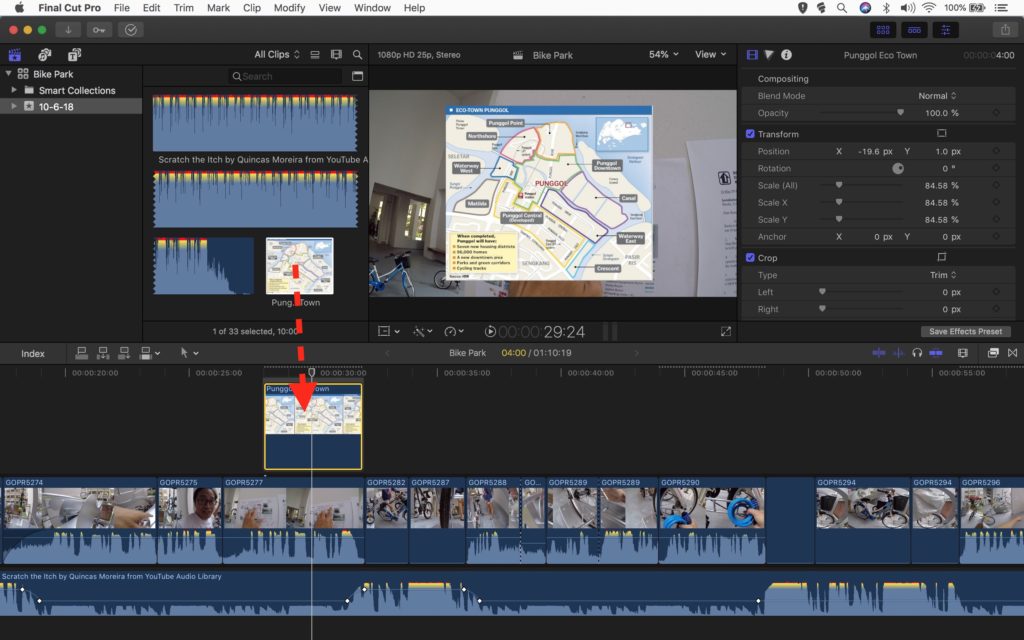
Step 15: Overlay Media
Drag and drop a new media over the main video track to create an overlay.
Step 16: Export Video
Finally, let’s put all the video clips, music and text together into one single video file, aka EXPORT.
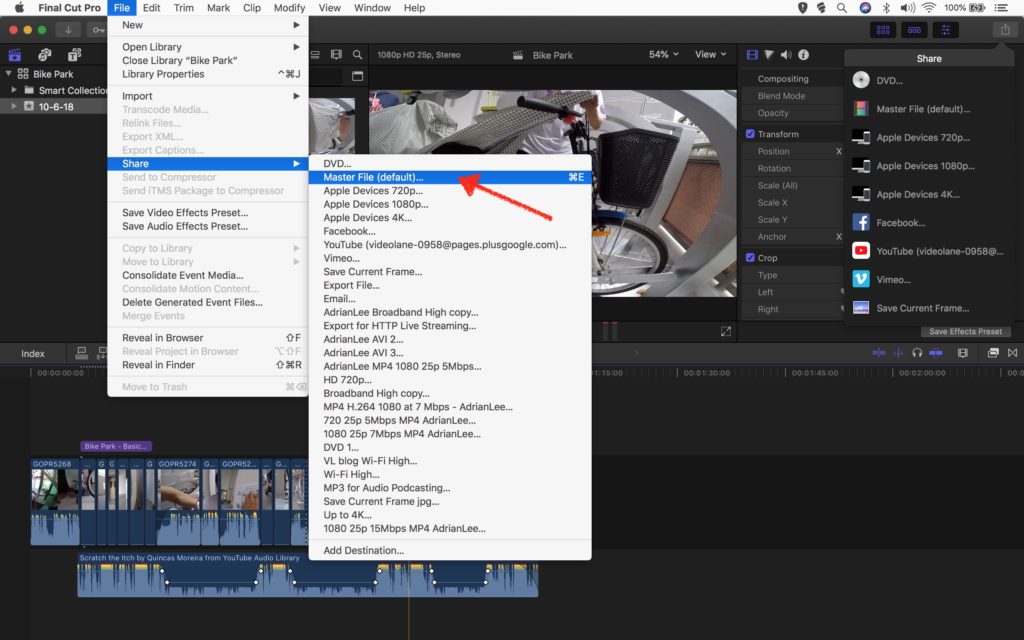
From the main menu, select File > Share > Master File (default)…
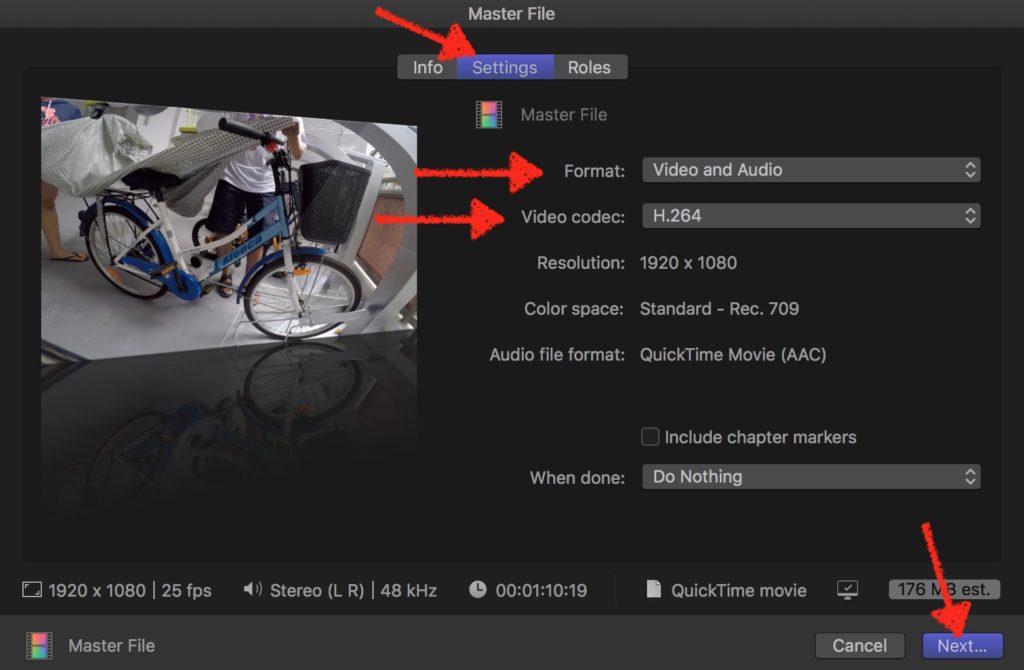
(1) Click on Master File Settings tab. (2) Choose Video and Audio Format. (3) Choose H.264 Video Codec. (4) Click Next.
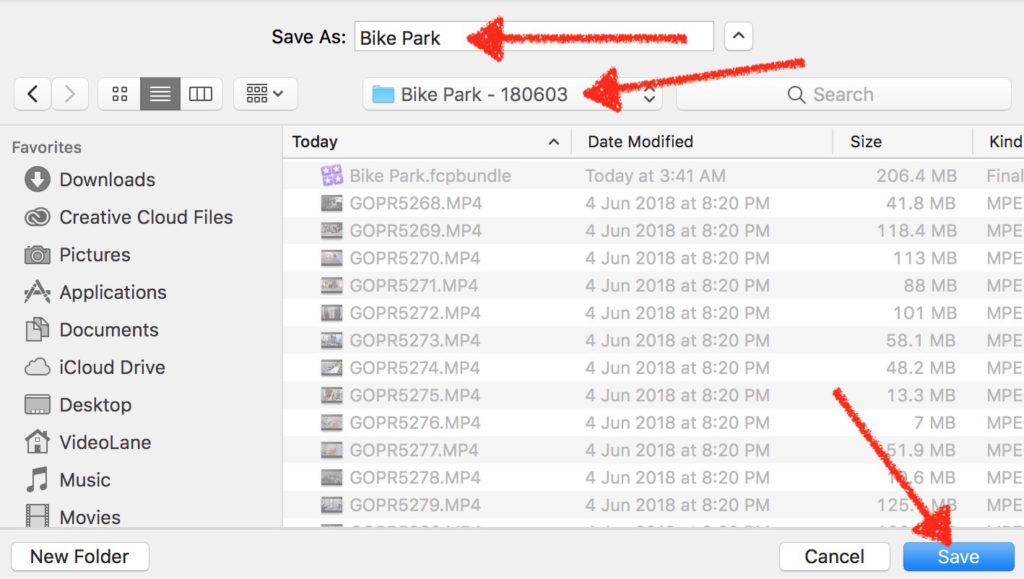
(1) Type in the video file name. (2) Choose the project folder to save the video file in. (3) Click Save.
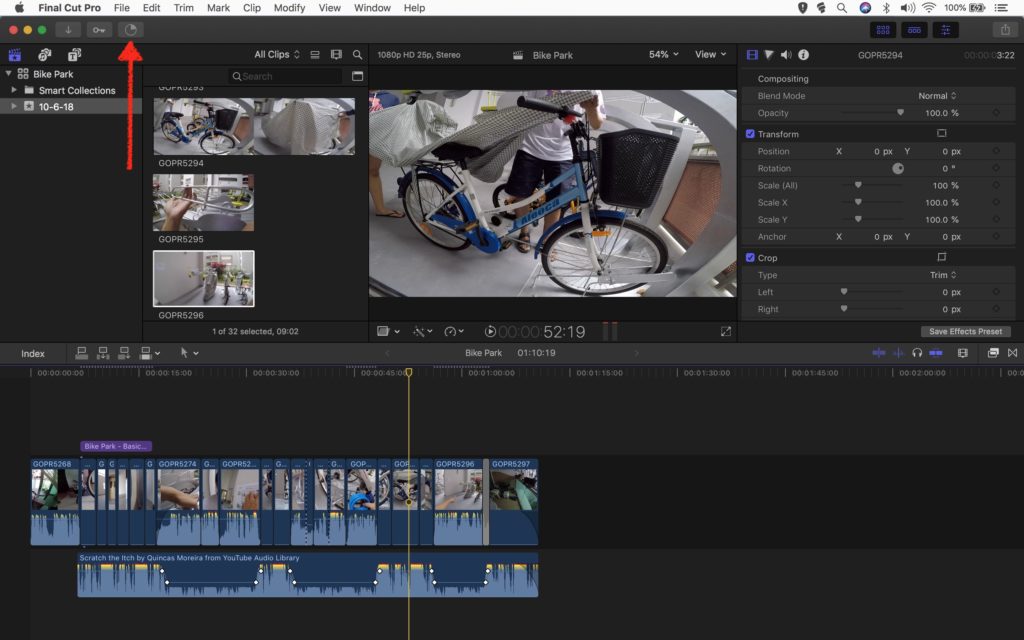
Wait for the export file to process.
That’s it! Go to the project folder and look for the video file.
How to Crossfade Audio in FCPX while video remains as a straight-cut?
- Select two adjacent clips in the timeline, then choose Clip > Expand Audio (or press Control-S). The clips appear expanded.
- Drag the end point of the first clip and the start point of the second clip so that the audio portions of the clips overlap. Note: Make sure to adjust the audio overlap to the length you want.
- Drag the fade handles of each clip to the points where you want the fade to begin and end. To change the fade shape for each clip, follow the instructions in Change the fade shape when using fade handles, below.
- Control-click a fade handle and choose a fade option:
- Linear: Maintains a constant rate of change over the length of the fade.
- S-curve: Eases in and out of the fade with the midpoint at 0 dB.
- +3dB: Starts quickly and then slowly tapers off toward the end. This is the most useful setting for quick fades.
- –3dB: Starts slowly and then moves quickly toward the end. This is the default setting and is best for maintaining a natural volume when crossfading between two clips.
- Control-click a fade handle and choose a fade option:
How to Attach Audio Connection Point to a Different Clip?
- Select Audio Clip in Timeline
- Press Command+Option
- Click on the desired connection point in the Audio Clip
How to speed up FCPX’s slow background rendering?
Create optimized and proxy files after import. Control-click one or more clips in the browser, then choose Transcode Media. In the window that appears, select the “Create optimized media” checkbox, the “Create proxy media” checkbox, or both, then click OK.
- Free Animated Titles and Transitions for FCPX – http://free.lenofx.com/search?keyword=free
- When to Use Optimized, Proxy, or Native Media
Final Cut Pro X Tutorial
[wpanchor id=”advanced”]Next, let’s go beyond basics…
Advanced Final Cut Pro X Tutorial
- Coming soon… SUBSCRIBE!
How to install motion templates titles zipped files in FCPX
- Unzip the zip file.
- Move the unzipped folders into Movies/Motion Templates directory. Eg “Mac HD > username > Movies > Motion Templates”. Put it in the Titles folder.
- Quit and restart FCP X.

![]()
