Recently, I was having fun with a visual effect for a product video: making it look like I am grabbing an object out of my computer screen.
I put together a quick video showing how, and I wanted to share the steps here on the blog, too.
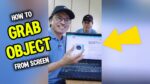
Watch the video on YouTube: https://youtu.be/vngO7dVvGCg
Ready to add some magic to your videos? Let’s dive in!
Part 1: Filming the Action – Setting the Stage
First things first, you need to film the core action.
- The Pretend Grab: Record yourself reaching towards your computer screen and pretending to grasp the object displayed there with your fingers.
- The Reveal: Without moving your grabbing hand, use your other hand to place the real object into your grabbing hand, right where your fingers were “holding” the screen version. Then, smoothly pretend to pull the real object away from the screen.
My Pro Tips for Selling the Illusion:
- The Laptop Angle: I thought that opening my laptop screen only partially (half-closed) helps convince viewers they’re looking at a real screen environment, not just a flat image.
- No Touching! Crucially, when you pretend to grab the object on the screen, make sure you don’t actually touch the screen. Leave a small gap.
- Size Matching: Before filming, figure out the distance you need to be from the screen so that the real object in your hand will appear the same size as the image on the screen when you do the “pull away.” This visual consistency is key!
You might notice that after I pull the object away, the image on the screen magically disappears. How? That’s the next part of our trick!
Part 2: Prepping the Screen – The Digital Disappearing Act
This part involves a little prep work on your computer (I used Windows, but the principle applies elsewhere).
- Find Your Image: I navigated to the webcam’s sales page on my browser – the object I wanted to “grab.” I made sure the colour matched my real webcam.
- Screen Capture Time: Press Shift + Windows + S (on Windows) to activate the screen capture tool. Grab a snapshot of the entire screen displaying the object.
- Edit Time (Paint is Fine!): Open that captured image. I used the basic “Edit in Paint” option.
- Use the “Selection” tool to draw a box around the object (the webcam).
- Right-click the selection and choose “Cut”. This removes the object, leaving the background.
- Go to “File” -> “Save As” and save this modified image as a new JPEG file. You now have two images: one with the object, one without.
- Google Slides Setup: This is my simple trick for the quick change!
- Open Google Slides and start a blank presentation.
- On the first slide, insert the original screen capture (with the object) and set it as the slide background.
- Add a second slide. Insert the second image (the one without the object) and set that as the background for this slide.
- The Switch: Start the slideshow. Now, when you press the right arrow key, the slide instantly switches from the image with the object to the image without it!
During filming, right after I place the real object in my hand, I discreetly use my other hand to press that right arrow key. (Yep, it’s a total one-man show – the life of a Creative Solopreneur sometimes means being your own assistant!)
Part 3: Editing Magic in CapCut – Bringing It All Together
Now we take our footage and the screen trick into CapCut (my favorite mobile editor!) to create the final illusion.
- Import: Open CapCut and start a new project. Select your recording and tap “Add”.
- First Split: Move the timeline to the exact moment just before you start pulling the real object away (while you’re still pretending to hold it on the screen). Select the clip and hit “Split”.
- Second Split: Move the timeline forward to the moment just after the real object is clearly in your hand and moving away from the screen. Hit “Split” again.
- Delete the Middle: You now have three segments. The middle segment contains the awkward transition (placing the object, hitting the arrow key). Select this middle clip and tap “Delete”.
Now, when you play it back, the video jumps seamlessly from you pretending to hold the object on the screen (with the original screen image visible) to you pulling the real object away (with the object now gone from the screen background)!
Try It Yourself!
And that’s the secret! It’s a combination of clever filming, simple image prep, and precise editing in CapCut. It’s a fantastic example of how, as content creators, we can achieve impressive results without always needing Hollywood-level tools.
Give this effect a try in your next video! It’s perfect for product features, creative intros, or just adding a bit of fun to your content.
What do you think? Was this tutorial helpful? Let me know in the comments below if you try this effect out!
Don’t forget to subscribe to my YouTube channel for more tutorials and follow my journey across TikTok, Instagram, and Facebook! And if you want valuable content creation tips delivered straight to your inbox every Friday, make sure you’re signed up for my newsletter!
Keep creating!
~ Adrian Lee
![]()

Discover more from VIDEOLANE.COM ⏩
Subscribe to get the latest posts sent to your email.